VTK Adjust Transfer Functions for Volume Rendering
When it comes to rendering medical images in 3D volume using either the Cornerstone library or the VTK library directly, mastering the widely-used WW/WL tool becomes essential. This tool equips radiologists with the precision to adjust visualization focus within a specific window, thereby enhancing diagnostic capabilities.
Rendering volumes in VTK involves manipulating various properties, offering users the necessary control for nuanced visualization. These properties include:
- Color Transfer Function
- Scalar Opacity
- Gradient Opacity
- Interpolation
- Shade
- Ambient
- Diffuse
- Specular
- Specular Power
While each property contributes to the rendering outcome, for the purpose of this discussion, the focus will be primarily on the trifecta essential for volume adjustment: color transfer function, scalar opacity, and gradient opacity.
Understanding Color Transfer Function and Scalar Opacity
The color transfer function maps scalar values, typically representing tissue density or other physical properties, to colors for visualization purposes. Simultaneously, scalar opacity controls the transparency of these scalar values.
Consider the following example values:
-3024 ➔ 0 0 0
-16.4458 ➔ 0.729412 0.254902 0.301961
641.385 ➔ 0.905882 0.815686 0.552941
3071 ➔ 1 1 1
In this representation, the first sRGB point dictates the color from voxel values -3024 to -16.4458, colored with black (0 0 0), while scalar opacity values dictate visibility:
-3024 ➔ 0
-16.4458 ➔ 0
641.385 ➔ 0.715686
3071 ➔ 0.705882
These values encapsulate a function for a range of points, defining both color and opacity. The first range, -3024 to -16.4458, will be hidden because the opacity is 0.
In Cornerstone, achieving this is facilitated by the applyPreset function, as demonstrated below:
const preset = {
	name: 'CT-Bone',
	gradientOpacity: '4 0 1 255 1',
	specularPower: '10',
	scalarOpacity: '8 -3024 0 -16.4458 0 641.385 0.715686 3071 0.705882',
	specular: '0.2',
	shade: '1',
	ambient: '0.1',
	colorTransfer:
	'16 -3024 0 0 0 -16.4458 0.729412 0.254902 0.301961 641.385 0.905882 0.815686 0.552941 3071 1 1 1',
	diffuse: '0.9',
	interpolation: '1',
}

utilities.applyPreset(
    volumeActor.actor,
    preset
);
Similarly, in VTK, achieving this functionality can be accomplished with the following code:
import vtkColorTransferFunction from '@kitware/vtk.js/Rendering/Core/ColorTransferFunction';

// Create a color transfer function
const colorTransferFunction = vtkColorTransferFunction.newInstance();
colorTransferFunction.addRGBPoint(-3024, 0.0, 0.0, 0.0);
colorTransferFunction.addRGBPoint(-16.4458, 0.729412, 0.254902, 0.301961);
colorTransferFunction.addRGBPoint(641.385, 0.905882, 0.815686, 0.552941);
colorTransferFunction.addRGBPoint(3071, 1.0, 1.0, 1.0);

// Apply the color transfer function to the volume property
const volumeProperty = vtk.VolumeProperty.newInstance();
volumeProperty.setRGBTransferFunction(0, colorTransferFunction);
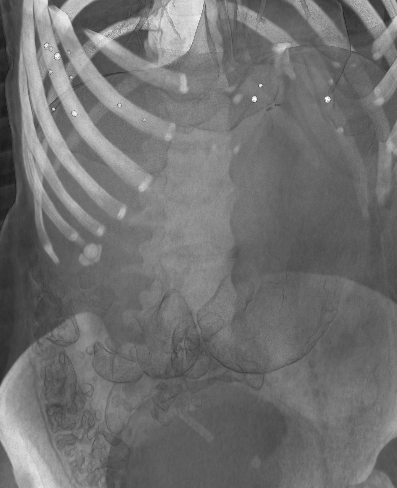
By manipulating these presets, users can finely adjust rendering parameters to suit their visualization needs. For instance, altering the color and opacity values can significantly impact the visualization outcome, as depicted in the images below:
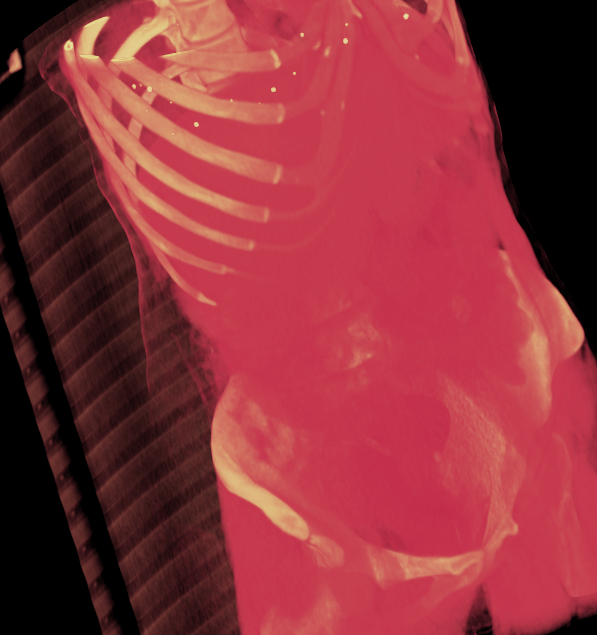
Upon adjusting parameters like point values and opacity, the visualization adapts accordingly, as illustrated below:
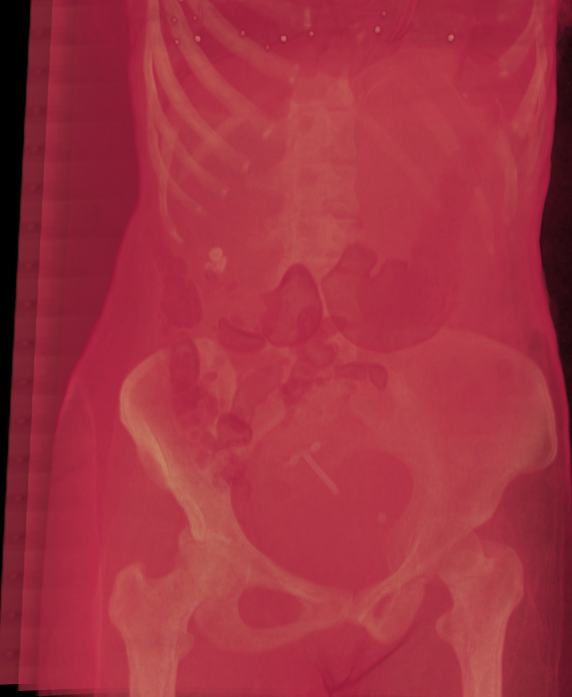
Point -16.4458 changed to -160.4458 and its opacity from 0 to 1, allowing soft tissues to appear after reducing the overall gradient opacity.
Control the Gradient Opacity
Setting the value of the Gradient Opacity, as in this VTK example VTK Volume Viewer, enables the appearance or disappearance of different layers from the volume.
Change Gradient Opacity for Enhanced Control
Controlling gradient opacity dynamically manages the appearance of different layers within the volume. By configuring the gradient opacity values, users can dictate the visibility of various layers, thereby enhancing the interpretability of the rendered volume.
Experimenting with gradient opacity parameters can unveil hidden details or emphasize specific anatomical structures within the volume, empowering users with enhanced diagnostic capabilities.
And this can be done with this function:
const opacity = 1;

const n = this.actor.getMapper().getInputData(),
    r = (n.getPointData().getScalars() || n.getPointData().getArrays()[0]).getRange();
const o = Math.max(0, opacity - 0.3) / 0.7;

this.actor.getProperty().setUseGradientOpacity(0, true);
this.actor.getProperty().setGradientOpacityMinimumValue(0, 2 * (r[1] - r[0]) * o * o);
this.actor.getProperty().setGradientOpacityMinimumOpacity(0, opacity);
this.actor.getProperty().setGradientOpacityMaximumValue(0, 1 * (r[1] - r[0]));
This can be very noticed with preset like CT-Soft-Tissue and here a three screenshots of three different Gradient Opacity values:
With 100%
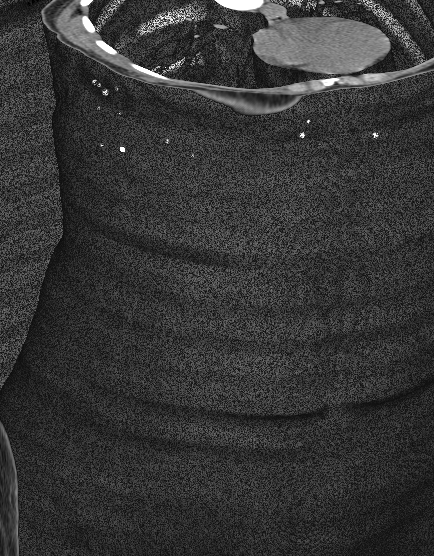
with 50%
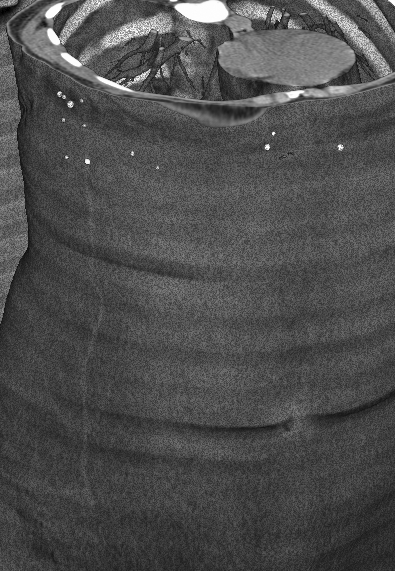
with 0%
Considering the complexity of adjusting transfer functions and opacity in volume rendering, there’s a great opportunity to create a user-friendly tool. This tool would allow medical professionals to easily tweak these settings, enhancing their ability to explore and understand volumetric data in real-time. Simplifying this process could lead to more accurate diagnoses and improved patient care.